Pin This

Saturday, January 29, 2011

From Beast to Beauty


This is a project I have wanted to do for quite some time. So you can imagine my excitement, when the other day I was asked by a co-worker, what to do with a rusty Dutch Oven. I explained to him what I knew and gave him some ideas. Then it hit me – “Hey can I re-season one of your ovens, for my blog?”  He said “Sure” and last Thursday he brought this in…

The Beast

inside the Beast

Now there are varying degrees of rust… one is “oops” forgot to wipe it dry, there’s “I’ll deal with it later” and put it on a shed shelf, then there is “neglect” leaving it out in the weather.  I understand that none of this is intentional, we all have very busy lives and stuff happens. As a Dutch Oven enthusiast –it is painful to see rusty pots. When I brought this home on Thursday I had it sitting on my kitchen table, my daughter walked past and grabbed a kitchen towel and tossed it over the oven and said “I just can’t look at it Mom, it‘s too sad”. 
Well as you can see these types of pots are not a lost and don’t need to be thrown out.  They just need a little attention. On the IDOS web site (IDOS) they show you how to clean these with Electrolysis. And I have read some articles that use sand blasting. Well I’m not that technical. The easiest way I have found, granted I did not use it today, is to put your Dutch Oven in a self cleaning oven lock it and turn it on. There are a lot of things that can go wrong with this method, one is, it can catch fire (how much oil is on your pot?), it can smoke, and heat up your house, plus you now have to clean out your oven. This works well if you have a pot that has gone rancid, or just has a funky odor. Vist this web site for more info. What's cooking America
I chose today to use my propane BBQ grill. This I know can reach temperatures of up to 500° plus (weather pending). So here is what I did step by step.

1.  What you’ll need – a grill, propane, a pair of “welding” gloves or very thick leather gloves, a wire brush, a drill, and a rust stripping wheel for the drill, some cotton cloths, oil.
2.  Take the oven and brush with the wire brush to remove any loose particles.
3.  Remove the lid and place the oven, upside down and place the lid on top of the legs. (There are ovens that do not have legs; just set the lid to the side of it if there is room, if not you will have to season it separately.)
4.  Turn the grill on high, and close the lid. For 2-3 hours. (Being that today was a cooler day this took about 3 hours.)
 5.  At the 2-3 hour mark.  Shut the grill off.
6.  Take the wire brush to them again knocking off all the loose flaky particles.
 7. Then I went to the garage and borrowed my husbands’ cordless drill and wire wheel, and went to work, it was amazing to see all that came off. The extreme high heat will reduce any organic matter to a fine powder and when you hit it with that wire brush you might want a mask. (edited note: do not use a lot of pressure if you use the drill & wheel as it may burnish your pot and you will have problems seasoning it, I am a wimpy person and did not apply much pressure to cause any burnishing) 
8.  One I finished I wiped them (the lid and pot) with a clean dry cloth to remove any dust.
9.   I turned the heat on them once again. This time only for about an hour.
10. One last time with the wire wheel.
11. Wiped them off and coated them with canola oil (there are many different opinions on what to season an oven with – you have canola oil, Crisco, olive oil, cooking spray (Pam), Camp Chef conditioner… My opinion is it depends on how often you cook in them, and where do you store them. My skillets that are used daily I have no problem spraying them with cooking spray (Pam). My “flat bottoms” that are used weekly, olive oil.  My Ovens that I compete with – canola oil, because they are stored in bags out in my garage they are subject to temperature changes and that is something you have to look at.)
12. I heated them up again and re-oiled, while it was still hot.
13. Let it cool and wipe with oil.


Beauty


You can repeat these last 2 steps a couple of times till you reach the patina you like. I have seen some beautiful ovens that are better than any “non stick” pans on the market.
I am excited to take this back to my co-worker on Monday, he said he had other ovens and would use my blog/instructions to re-season them and put them to use. Please let me know if you need help, as odd as it may sound, this was fun. :o)

Don't give up on cast iron if it's rusty - it can be saved.

Just as a little side note - about a year ago I had to go in for an iron drip due to extreme anemia, I have been cooking more and more in my cast iron over the past year and my anemia is gone. People will tell you stories of how cooking in cast iron is not good for you and how food cross contaminates. If you care for your pots this is not a problem, and it can be healthy.

As for regular cleaning - some say don't put them in water (rust)... well yeah... if you don't dry it. Dry it well and hit it with a little oil and it's good to go.  Some say don't use soap - just don't go over board, don't let it soak, rinse it and oil it and you are good to go. NEVER put cast iron in the dishwasher.
Have fun cookin'
Cyndi

Tuesday, January 11, 2011

Mesquite – the aftermath…

With the van packed, floor to ceiling, and the overflow packed into Dad’s car. We headed for Mesquite about 5:30 PM (after picking Rod up in SLC). The drive started a little hairy; with rush hour traffic on I-215, the merge to I-15, then the ugliness from Lehi to Spanish Fork, total white knuckled drive. Nephi could not have come sooner, for Rod to take the wheel.
We arrived at the Casa Blanca Hotel & Casino about 11:30, to check in. We were told to park in the back where the cook-off would be (for security reasons). We had to walk through the Casino and down the hall to the elevators and up to the 5th floor, to our rooms. It seemed like we had to walk a mile just to get to our room. The rooms were nice, and the pillows were inviting.  The draw of the lights and the bustle of the casino beckoned to us. While walking around the casino looking for the arcade we were “cased” by a security guard. As we walked to the back of the room, I turned to the guard, to ask were the arcade was. I think I totally caught him off guard ‘cause he looked totally befuddled. He showed us where it was and told us that it closed at 11PM.  So with the arcade closed, the girls had no choice but to call it a night. As we were walking back to the room we stopped for a minute to check out the band (ok, the drunk people dancing to the band) that was playing and yet another guard came up to us and told the girls that they were not allowed on the floor. So Melissa wanted to know if she was supposed to levitate while in the casino. The Casa Blanca, we have decided is not very family friendly. We may have to check out the Virgin River next time.
COOK-OFF
Day 1 - Friday morning we got up and went down to set up our booth, when I realized that I forgot the garnish for my dishes. I am very grateful that Mesquite has a Wal-Mart and a Smith’s – I sent Rod and Becka to get me stuff to garnish my dishes with. 
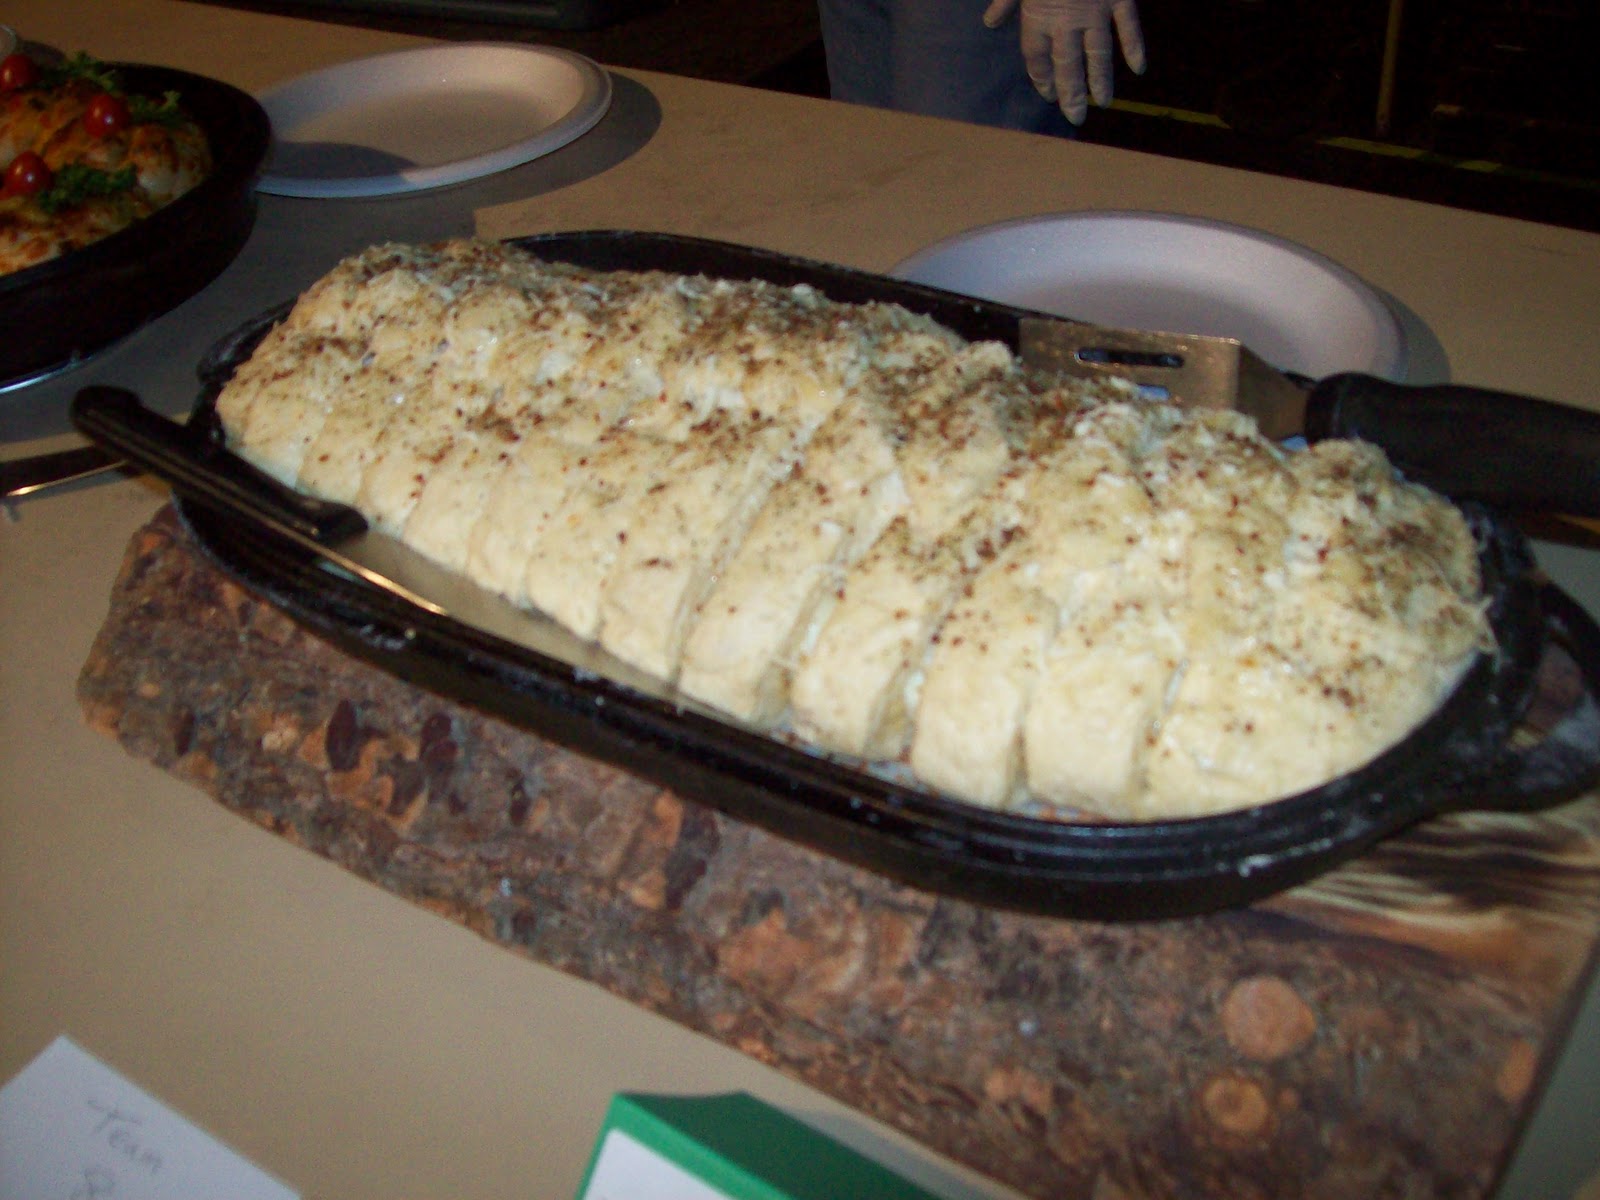
In the cooks meeting we were all informed for our starting time, as well as when the dishes were due. With the staggered times I knew it would be a stretch for my dessert to come out, and as you can see by the pictures – it did not set as planned. 1st hurdle, Melissa went to work on her bread, it looked phenomenal, I was pretty excited for it, put it on the coals and when they called for it , it was still doughy on the top, 2nd hurdle – lessons learned… Elevation!! Briquettes spend faster. My main course turned out beautifully – and yes I remembered to take the strings off it this time.
Judging – Well with all the issues we had I was pretty certain that we did not make the 3 pot on Saturday. Sure enough – we only got to do the 2, the side and dessert.
Day 2 -Saturday was a beautiful day, highs reached about 50°, When I talked to Andrew he said it was 19° and snowing here at home and on his was to class. So no matter how this day went – the weather was prize enough!  For our side dish we cooked Rosemary potatoes, they looked beautiful, and smelled heavenly, but I guess some said they were not done enough, sorry they are not mashed potatoes folks, I thought they were done just right.  And out cake – well here is the epic fail – I have lived most of my life at the 4500-5300 elevation, I did not even think anything of it when making these cakes, let’s just say they could have passed for cookies they were so thin and dry. They looked beautiful …. Just not as good as they could have.
Did we have fun?
OH HECK YEAH!!!
Will we do it again?
ABSOLUTELY!
And yes our priority will be getting us better transportation, the Tetris game and the back of my van is getting old.
It was so good to see our Dutch oven family again. I love how, no matter who you are, or where you come from, a little black pot full of tantalizing goodness will bring you together like a big family reunion.
Beef Wellington
Duxelles
3 pints (1 1/2 pounds) mushrooms                               2 shallots, peeled and roughly chopped
4 cloves garlic, peeled and roughly chopped                2 sprigs fresh thyme, leaves only
2 tablespoons butter                                                        2 tablespoons extra-virgin olive oil
Kosher salt                                                                        Freshly ground black pepper
Finely chop mushrooms, shallots, garlic, and thyme to. Add butter and olive oil to a large sauté pan and set over medium heat. Add the shallot and mushroom mixture and sauté for 8 to 10 minutes until most of the liquid has evaporated. Season with salt and pepper and set aside to cool.

For the Beef
1 (3-pound) center cut beef tenderloin (filet mignon), trimmed
Extra-virgin olive oil                                                      Kosher salt
Ground black pepper                                                     6 sprigs of fresh thyme, leaves only
Flour, for rolling out puff pastry                                   1 pound puff pastry, thawed
1/2 teaspoon coarse sea salt                                         12 thin slices prosciutto
2 tablespoons Dijon mustard                                        2 large eggs, lightly beaten

Tie the tenderloin so it holds its cylindrical shape while cooking. Drizzle with olive oil, then season with salt and pepper and sear all over, including the ends, in a hot, 12” D/O lightly coated with olive oil - about 2 to 3 minutes. Meanwhile set out your prosciutto on a sheet of plastic wrap (plastic needs to be about a foot and a half in length so you can wrap and tie the roast up in it) on top of your cutting board. Shingle the prosciutto so it forms a rectangle that is big enough to encompass the entire filet of beef. Using a rubber spatula cover evenly with a thin layer of duxelles. Season the surface of the duxelles with salt and pepper and sprinkle with fresh thyme leaves. When the beef is seared, remove from heat, cut off twine and smear lightly all over with Dijon mustard. Allow to cool slightly, then roll up in the duxelles covered prosciutto using the plastic wrap to tie it up nice and tight. Tuck in the ends of the prosciutto as you roll to completely encompass the beef. Roll it up tightly in plastic wrap and twist the ends to seal it completely and hold it in a nice log shape. Set in the cooler for 30 minutes to ensure it maintains its shape. Preheat oven to 425 degrees F.
On a lightly floured surface set your puff pastry out to thaw. Depending on the size of your sheets you may have to overlap 2 sheets and press them together. Remove beef from cooler and cut off plastic. Set the beef in the center of the pastry and fold over the longer sides, brushing with egg wash to seal. Trim ends if necessary then brush with egg wash and fold over to completely seal the beef - saving ends to use as a decoration on top if desired. Top with coarse sea salt. Place the beef seam side down on a baking sheet.
Brush the top of the pastry with egg wash then make a couple of slits in the top of the pastry using the tip of a paring knife - this creates vents that will allow the steam to escape when cooking. Bake for 40 to 45 minutes until pastry is golden brown and beef registers 125 degrees F on an instant-read thermometer. Remove from oven and rest before cutting into thick slices.

Mediterranean Bread
Dough                                                                                     Filling
5-6 C Flour                                                                              1/3 C Olive oil,                       
3 Tbsp Active dry yeast                                                        1/2 lb Mozzarella shredded
1/2 C Sugar                                                                             Sun Dried tomatoes (to taste)
1 Tbsp Salt                                                                               1 tsp Paprika
1 tsp Mrs. Dash                                                                       Chopped olives (to taste)
1 Can Evaporated Milk                                                           Fresh Basil thinly sliced
1/2 C Milk                                                                                1 tsp garlic pwdr & 2 cloves minced
1 egg beaten                                                                             1 tsp Seasoned Salt,   
1/3 C butter or butter flavored shortening- melted          1/2 C Asiago

Topping                                                                                   Variations
1/4 C Whipping cream                                                           Artichoke hearts
1/4 C Melted butter                                                               Spinach
1/4 C Parmesan cheese grated
In a mixing bowl combine 2 cups flour, yeast, sugar, Mrs. Dash and salt; blend well. Melt butter, add evaporated milk, and milk to bring to 120° F.  Beat egg .Combine.  Mix the milk & egg mixture in with the flour mixture – mix thoroughly. Mix in remaining flour 1 cup at a time until dough pulls away from the sides of the bowl. Turn dough out onto a floured board and knead it for 5 minutes until dough becomes elastic and sticky.  Roll dough generously in flour, then cover and place in a warm area to raise and double in size.
Assembling the dough for baking: Punch dough down then roll into rectangle about 9” x 13”brush dough lightly with olive oil, score dough in 3 columns in the center column sprinkle dough with garlic powder, garlic, basil, and seasoning salt, sprinkle (in thin layers) on mozzarella and sun dried tomatoes (thinly sliced) and chopped olives.  Cut the 2 outside column in to 1” strips, beginning with the top fold the top center down slightly do the same with the bottom and alternately fold strips over one another from top to bottom tucking the ends under. Place in a lightly greased oval DO. Cover Dutch oven and let rise for 15 minutes.
Brush top with whipping cream and sprinkle with parmesan cheese. Bake at 350° till golden brown.
Black Bottom Brownie Cheesecake

2 boxes Brownie mixes                                                                3 Tbs oil
1/3 C water                                                                                    3 eggs

Combine in a large bowl – pour into a 12 inch Dutch oven that has been lined with parchment paper. Place 8 coals on the bottom and 16 on the lid cook for 25 minutes or until the brownies are done.

1 C Raspberry                                                                              1 C Raspberry jam

While the brownies are baking mix the raspberries and the jam together- you can save a few raspberries for the top for garnish.  When the brownies are done, spread the raspberry mixture over the top of the brownies.

3 Pkgs Cream cheese                                                               ½ tsp vanilla
½ tsp lemon juice                                                                    1 C Sugar
3 Tbs flour                                                                                ½ tsp salt
3 eggs                                                                                        1 egg yolk
1/3 C milk
Beat Cream cheese until creamy, add vanilla and lemon. Mix sugar, flour and salt, gradually blend into cream cheese. Add 3 eggs and one egg yolk all at once, beat just until blended, gently stir in milk. Pour over cooked brownies and raspberry mixture. Cook in the Dutch oven with 6 coals on the lid and 8 coals on the bottom. Cook for another 55 minutes. Pull cake out of the oven and let cool for 2 hours in a cooler.
Danish Cake
Cake
3/4 cup shortening                                                         1 3/4 cups white sugar
3 cups cake flour                                                             1/2 teaspoon salt
4 teaspoons baking powder                                           1 cup milk
5 egg whites                                                                     1 teaspoon vanilla extract
1/2 teaspoon almond extract
Directions
Sift and measure flour. Add salt and baking powder, and sift again.
In a large bowl, cream shortening. Add sugar gradually, and cream until fluffy. Add sifted ingredients alternately with milk and flavoring. Beat thoroughly after each addition.
Beat egg whites until stiff, and fold into mixture. Pour batter into 2 lined or greased 12” Dutch Ovens bake with 17 coals on top 8 on bottom. Cook for 25 to 30 minutes or until a toothpick pressed into the center comes out clean.
Note: this can be made with a cake mix instead (easier). Also good with Raspberries & Raspberry Junket.
Topping
1 16 oz tub of cool whip                                                        1 8oz. pkg. of cream cheese
2 cups powdered sugar                                                        1 1lb strawberries
1 package of Junket Danish Dessert (Strawberry flavor)
Directions
While the two cakes are cooling, make the Danish Dessert following the pie glaze directions on the back of the box. Flip the cakes out of the Dutch Ovens onto the lids. Mix together 1 cup of powdered sugar with 16oz of cool whip. Mix well. In a separate bowl mix 1 cup of powdered sugar and 1 8 oz. pkg. of cream cheese.  Mix well. Mix the cream cheese mixture and the cool whip mixture together in a large bowl. Spread cool whip topping across the top of one of the cakes. Then lay about ½ of the strawberries on top of the cool whip topping. Place the other cake on top of the 1st and repeat cool whip topping, strawberries, then spread the Danish dessert across the top.
Rosemary Potatoes

2 tbsp olive oil                                                                             2 tsp paprika
1 ½ tsp crushed rosemary                                                       1 tsp minced garlic
1tsp salt                                                                                       ½ tsp ground pepper
2 lbs new potatoes quartered

Mix spices into olive oil, add potatoes, toss till well coated. Place in 12” D/O that has been coated with small amount of olive oil to prevent sticking. Roast @ 425 for 30 minutes or till potatoes are tender.

The pictures  of the winning dishes of this cook-off are on my Facebook page.

Please let me know if you have any questions.


Have fun cooking.
Cyndi


Sunday, January 2, 2011

Packing List / 2011 Mesquite Cook-off

1st off I want to apologize. I’ve been slacking a little. I had a hysterectomy on the 13th of December and then the holiday’s hit, and well I’ve been doing more than my Doctor says I should, but it’s so hard to just stay down when there is so much to do. You’d think I’d update my blog, but when, on pain pills nothing makes sense.

Well, on that note, (yes I know my 6 weeks of recovery are (still) not up yet) I am preparing for a $5000 cook-off in Mesquite NV next week Jan 7-8. Before I sent in my registration, I verified with the organizers if I could have a 3rd person on my team – their sole responsibilities are lifting (see, I’m listening to the Dr.). Melissa and I are cooking and Rod will be our “Lifter” the only things he can touch while we are competing are; the coals, to put the ovens on the coals, and to carry our dishes to the presenting table. Becka and Dad are going for moral support. I am pretty excited for this cook-off – it will  be like a mini vacation.

The next few days will be interesting to say the least.  Packing, for most people that would not be a problem, I drive a mini-van – not a truck. We will be playing the game of Tetris to fit all our stuff in and make room for everyone. I’m grateful Dad is coming because we might have to pack some stuff in his car (only if necessary).  So I thought I’d share with ya’ll my packing list. This is what I use whenever I compete or for that fact whenever I cook with my Dutch ovens –not at my home.

I’ll break it down for you so you can understand my thinking.

My necessary equipment for cooking;
The Stove:
Camp Chef two burner (I like the 2 burner because I can heat water and coals at the same time)
Propane
Mair Lid Lifters
Dutch Oven Tables / or Volcano
Dutch Ovens
Lid Lifters (I like the Mair ones)
Leather Gloves
Pliers
Briquettes
Lighter
    
Camp Chef

Matches (as a backup)
Chimney
Tongs
Metal Bucket
Small Shovel
Domes (Camp Chef and Volcano both make these)  

The Kitchen:
Canopy
Folding table (this one has adjustable legs so I can set it to counter top height (saves the back). For food preparation)
Banquet tables (I usually take 2. Sometimes they are provided for you. I use one at the front for display and the other is used for my wash basins and pantry. My have a upside down “T” leg others have a straight leg and you can make risers for them so all your tables can be at counter top height – they don’t work with mine that why I take the other table.)
Tablecloths
Paper Towel Rack
Pop-up garbage cans
Garbage bags
Camp Chairs
Wash basins
Water jugs / water (some places will have access to water some will not)

Dish Duty:
Dish soap
Clorox (for sanitation purposes)
Towels / Washcloths
Nylon Scrubbie (never use a copper scrubbie on your ovens)
Aprons
Disinfecting wipes
Paper towels

The Gadgets:
Cutting boards (multiple are nice, one for veggies, one for meat, etc…)
Knife set (I have a camping knife set that I found at a local sporting goods store has all the knives you will ever need. If you can’t find one of these sets then you’ll want a couple good chopping knives, a fillet knife as well as a couple paring knives, don’t forget you’ll need them for presentation too.)
Serving ware (spoons, forks, spatulas, as well as the knives)
Basting brush
Can opener
Dough Scraper
Garlic Mincer
Bounce Chopper
Salsa Chopper
Glass Measuring Cups (liquid)
Measuring Cups (dry)
Measuring Spoons
Mixing bowls
Mixing spoons
Silicone/ rubber spatulas
Rolling pin
Metal spatulas
Mandolin slicer (this is a nice gadget to have for uniform slices and thin slices)
Vidalia Onion Chopper (makes chopping veggies easier)
Vegetable peeler
Thermometer Bread (Candy)
Thermometer Meat (instant read)
Plastic ware (for tasting don’t use your fingers)
Parchment paper
Gloves (latex, plastic…food handlers)
Food Tents
Coolers

Pantry Necessities:
Canola oil (for cooking as well as re-seasoning your ovens)
First aid kit w/Burn Jel
Ziploc bags (all sizes)
Cooking spray
Hand sanitizer
Foil (don’t use to line your ovens, line your Dutch Oven table – for easy clean up)

Now can you see my dilemma – I get to figure out how to fit all this plus 4 people, their luggage and a couple coolers full of food, into a minivan and drive 371 miles to Mesquite.  I think we will have to use the car top carrier too. I am grateful the forecast for this weekend shows 48° for the high on Saturday and no rain or snow. I am looking forward to warm weather…wooo hooo, only because it is 27° outside right now.

I will post my (winning(I hope)) recipes on here when I get back.

Have fun cookin’
If you want more information about this cook off check out theses web sites.


Related Posts Plugin for WordPress, Blogger...