
This is a project I have wanted to do for quite some time. So you can imagine my excitement, when the other day I was asked by a co-worker, what to do with a rusty Dutch Oven. I explained to him what I knew and gave him some ideas. Then it hit me – “Hey can I re-season one of your ovens, for my blog?” He said “Sure” and last Thursday he brought this in…
 |
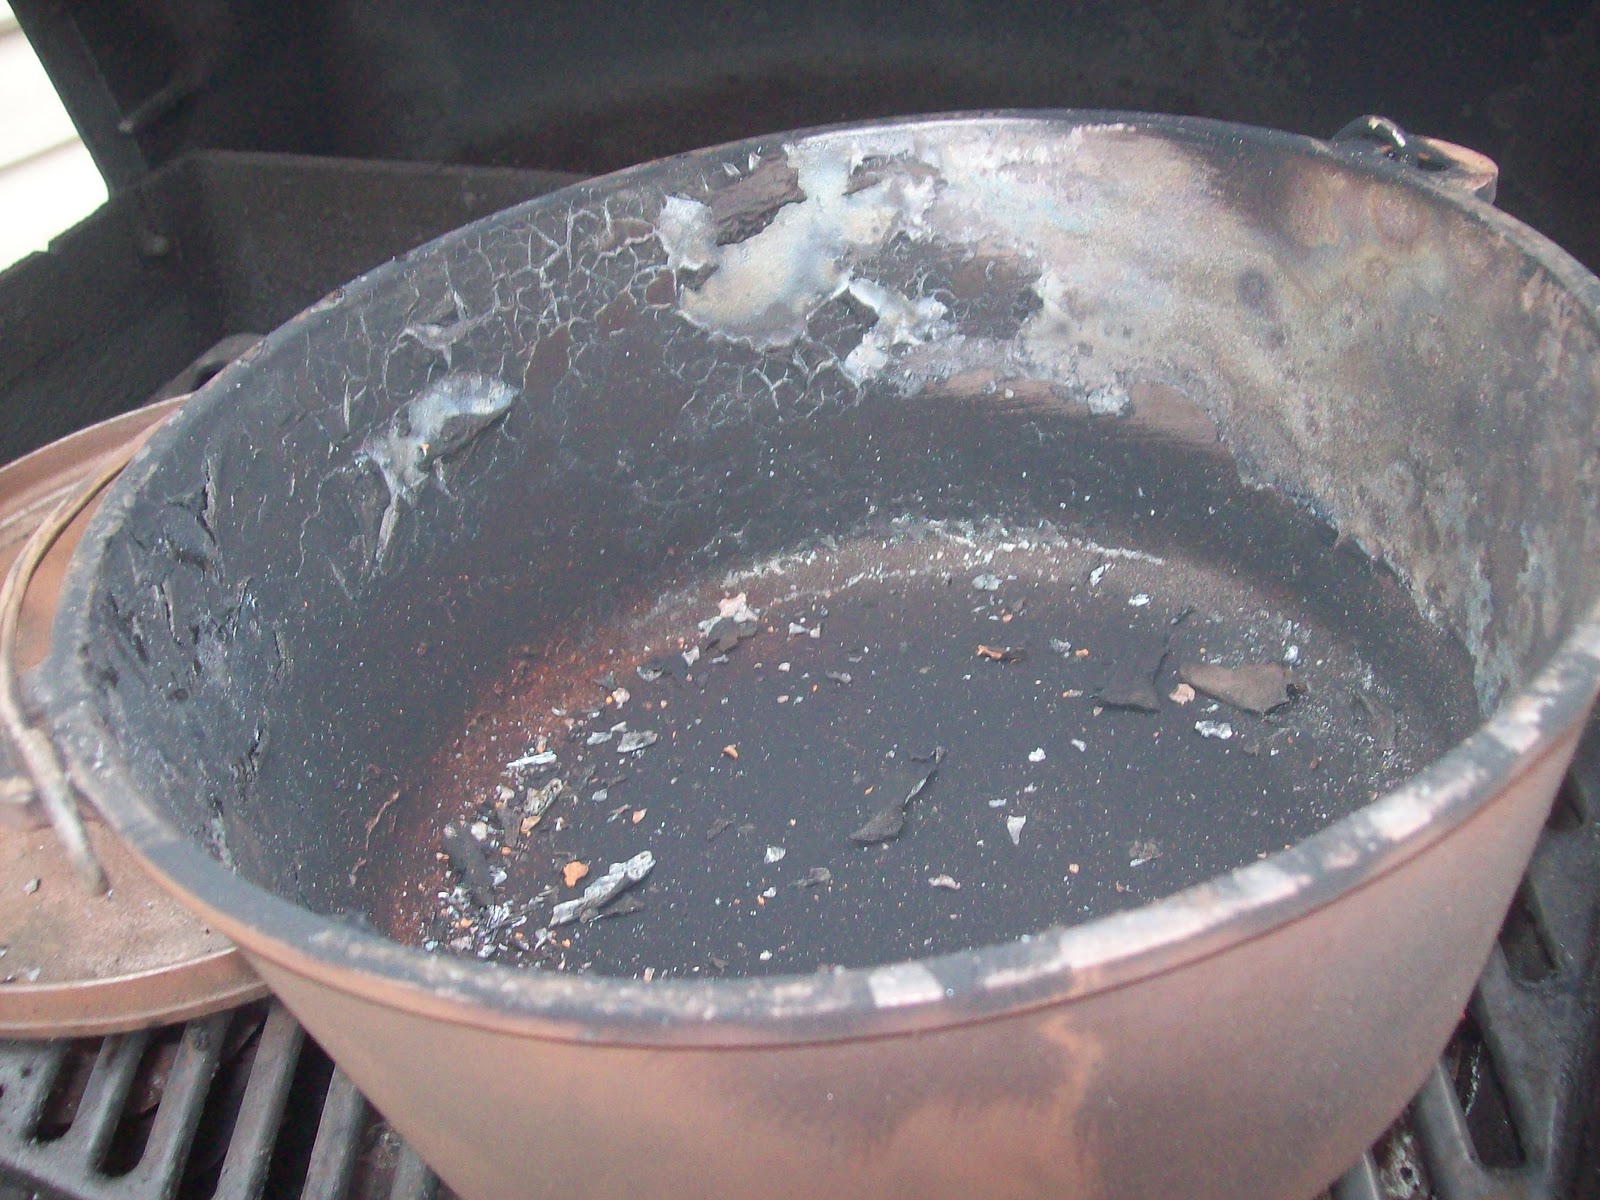
| The Beast |
 |
| inside the Beast |
Now there are varying degrees of rust… one is “oops” forgot to wipe it dry, there’s “I’ll deal with it later” and put it on a shed shelf, then there is “neglect” leaving it out in the weather. I understand that none of this is intentional, we all have very busy lives and stuff happens. As a Dutch Oven enthusiast –it is painful to see rusty pots. When I brought this home on Thursday I had it sitting on my kitchen table, my daughter walked past and grabbed a kitchen towel and tossed it over the oven and said “I just can’t look at it Mom, it‘s too sad”.
Well as you can see these types of pots are not a lost and don’t need to be thrown out. They just need a little attention. On the IDOS web site (IDOS) they show you how to clean these with Electrolysis. And I have read some articles that use sand blasting. Well I’m not that technical. The easiest way I have found, granted I did not use it today, is to put your Dutch Oven in a self cleaning oven lock it and turn it on. There are a lot of things that can go wrong with this method, one is, it can catch fire (how much oil is on your pot?), it can smoke, and heat up your house, plus you now have to clean out your oven. This works well if you have a pot that has gone rancid, or just has a funky odor. Vist this web site for more info. What's cooking America
I chose today to use my propane BBQ grill. This I know can reach temperatures of up to 500° plus (weather pending). So here is what I did step by step.
1. What you’ll need – a grill, propane, a pair of “welding” gloves or very thick leather gloves, a wire brush, a drill, and a rust stripping wheel for the drill, some cotton cloths, oil.


2. Take the oven and brush with the wire brush to remove any loose particles.
3. Remove the lid and place the oven, upside down and place the lid on top of the legs. (There are ovens that do not have legs; just set the lid to the side of it if there is room, if not you will have to season it separately.)

4. Turn the grill on high, and close the lid. For 2-3 hours. (Being that today was a cooler day this took about 3 hours.)

5. At the 2-3 hour mark. Shut the grill off.
6. Take the wire brush to them again knocking off all the loose flaky particles.
7. Then I went to the garage and borrowed my husbands’ cordless drill and wire wheel, and went to work, it was amazing to see all that came off. The extreme high heat will reduce any organic matter to a fine powder and when you hit it with that wire brush you might want a mask. (edited note: do not use a lot of pressure if you use the drill & wheel as it may burnish your pot and you will have problems seasoning it, I am a wimpy person and did not apply much pressure to cause any burnishing)
8. One I finished I wiped them (the lid and pot) with a clean dry cloth to remove any dust.

9. I turned the heat on them once again. This time only for about an hour.
10. One last time with the wire wheel.
11. Wiped them off and coated them with canola oil (there are many different opinions on what to season an oven with – you have canola oil, Crisco, olive oil, cooking spray (Pam), Camp Chef conditioner… My opinion is it depends on how often you cook in them, and where do you store them. My skillets that are used daily I have no problem spraying them with cooking spray (Pam). My “flat bottoms” that are used weekly, olive oil. My Ovens that I compete with – canola oil, because they are stored in bags out in my garage they are subject to temperature changes and that is something you have to look at.)
12. I heated them up again and re-oiled, while it was still hot.
13. Let it cool and wipe with oil.


 |
| Beauty |
You can repeat these last 2 steps a couple of times till you reach the patina you like. I have seen some beautiful ovens that are better than any “non stick” pans on the market.
I am excited to take this back to my co-worker on Monday, he said he had other ovens and would use my blog/instructions to re-season them and put them to use. Please let me know if you need help, as odd as it may sound, this was fun. :o)
Don't give up on cast iron if it's rusty - it can be saved.
Just as a little side note - about a year ago I had to go in for an iron drip due to extreme anemia, I have been cooking more and more in my cast iron over the past year and my anemia is gone. People will tell you stories of how cooking in cast iron is not good for you and how food cross contaminates. If you care for your pots this is not a problem, and it can be healthy.
As for regular cleaning - some say don't put them in water (rust)... well yeah... if you don't dry it. Dry it well and hit it with a little oil and it's good to go. Some say don't use soap - just don't go over board, don't let it soak, rinse it and oil it and you are good to go. NEVER put cast iron in the dishwasher.
Have fun cookin'
Cyndi
Excellent tutorial! Very well done.
ReplyDeleteThanks for sharing! I have a small sand blaster cabinet that I have tried a few times. It works ok if you have a small skillet and burn it off first as you described. But what i like is a scrub pad called a "Roloc". You can get coarse, medium and fine. 1" and 3" diameter. You will need the base that they screw into (about 1/4 of a turn?) but they aren't much. They should work well in a battery powered drill, but I use a 90 degree angle air tool.
ReplyDelete